Kia Sportage: Side body panel
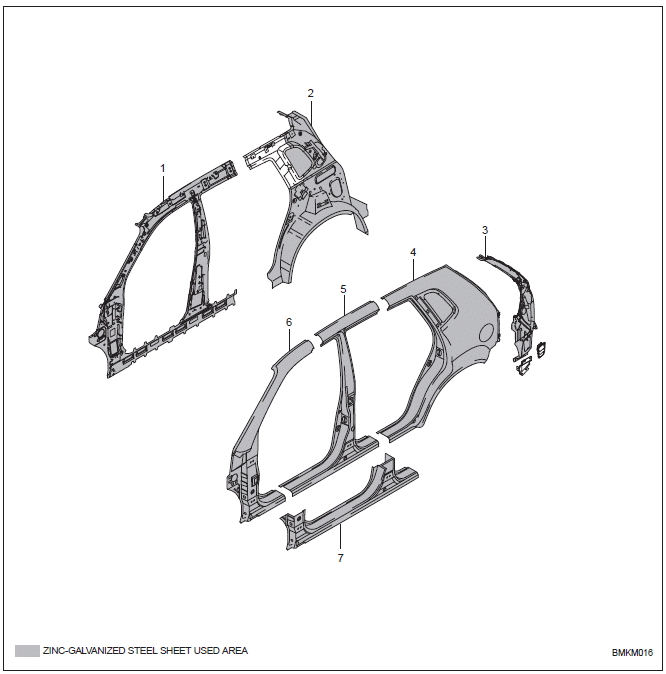
- Front inner pillar assembly
- Quarter inner panel assembly
- Side outer rear extension assembly
- Quarter outer panel assembly
- Center outer pillar assembly
- Pillar outer panel assembly
- Side assembly outer panel
Center floor panel
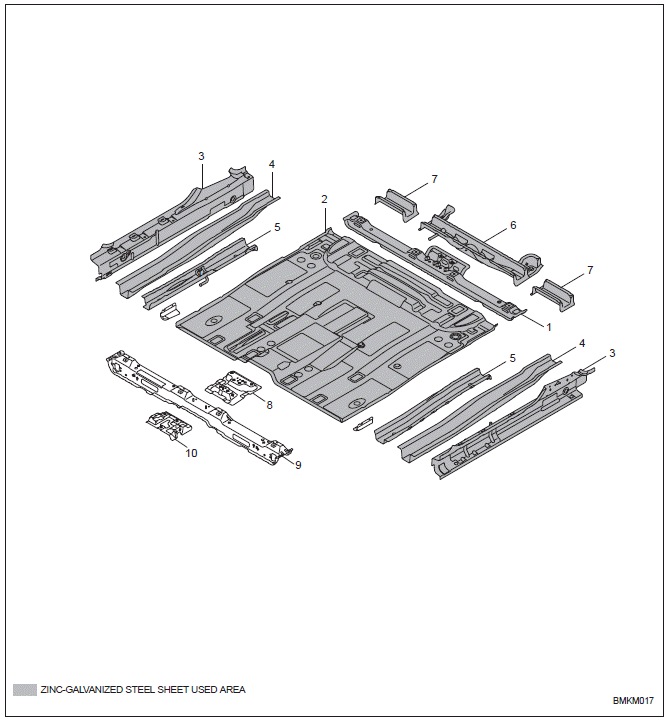
- Front seat cross rear member assembly
- Center floor panel
- Side sill inner panel assembly
- Center floor side outer member assembly
- Center floor side inner member assembly
- Propeller shaft mounting bracket
- Skid plate mounting gusset
- Parking brake lever reinforcement assembly
- Front seat cross front member assembly
- Center support bracket
Rear floor panel
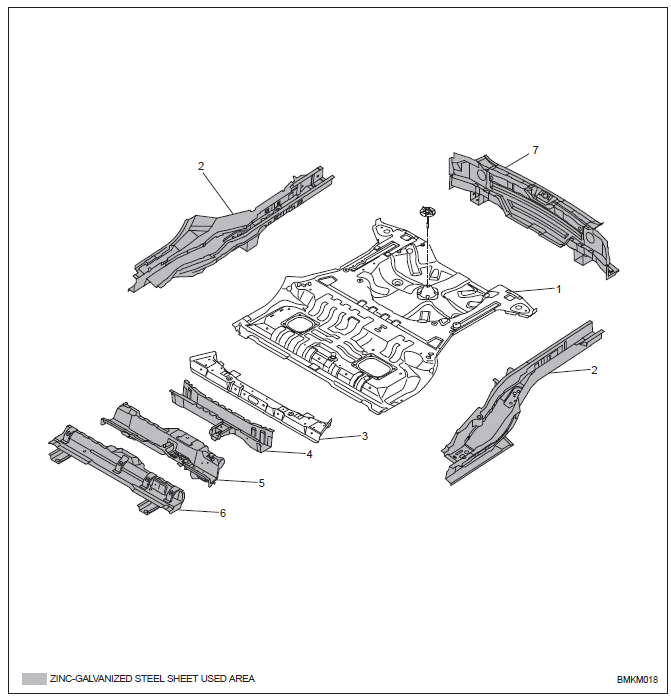
- Rear floor panel
- Rear floor side member assembly
- Rear floor upper cross member assembly
- Rear floor lower No.3 cross member assembly
- Rear floor lower No.2 cross member assembly
- Rear floor lower No.1 cross member assembly
- Rear end cross member assembly
READ NEXT:
 Roof panel (Without sunroof)
Roof front rail assembly
Roof rear rail assembly
Roof panel
Roof center No.1 rail
Roof center No.2 rail
Roof center No.3 rail
Roof panel (With sunroof)
Roof front rail assembly
Fender panel & Hood panel & Tail gate panel
Hood panel assembly
Hood hinge assembly
Fender panel
Tail gate panel assembly
Tail gate hinge assembly
Door panel
Front door panel assembly
Rear door panel assembly
Front doo
Replacing body panels
Replacing body panels
Codes for disassembling and assembling body panels
SEE MORE:
Roof panel (Without sunroof)
Roof front rail assembly
Roof rear rail assembly
Roof panel
Roof center No.1 rail
Roof center No.2 rail
Roof center No.3 rail
Roof panel (With sunroof)
Roof front rail assembly
Roof rear rail assembly
Roof panel
Sunroof reinforcement
Roof center No.3 rail
Highway Driving Assist malfunction and limitations
Highway Driving Assist malfunction
A: Check Highway Driving Assist system
When Highway Driving Assist is not
working properly, the warning message
will appear, and the ( A ) warning light
will appear on the cluster. Have Highway
Driving Assist be inspected by an authorized
Kia dealer.
WA
Content
- Home
- Kia Sportage - Fifth generation (NQ5) - (2022-2025) - Owner's Manual
- Kia Sportage - Second generation (JEKM) (2005-2015) - Body Workshop Manual
- Kia Sportage Third generation (SL) - (2011-2016) - Service and Repair Manual
- Sitemap
- Top articles
