Kia Sportage: Rear Upper Arm | Rear Lower Arm
Repair procedures
Replacement
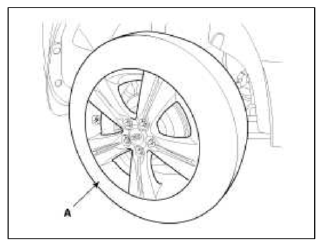
1. Remove the rear wheel & tire.
Tightening torque: 88.3 ~ 107.9N.m (9.0 ~ 11.0kgf.m, 65.1 ~ 79.6lb-ft)
CAUTION
Be careful not to damage to the hub bolts when removing the front wheel & tire (A).
2. Loosen the bolt & nut and then remove the rear upper arm (A) with the rear axle.
Tightening torque:
2WD
137.3 ~ 156.9N.m (14.0 ~ 16.0kgf.m, 101.3 ~ 115.7lb-ft)
4WD
98.1 ~ 117.7N.m (10.0 ~ 12.0kgf.m, 72.3 ~ 86.8lb-ft
[2WD]
![[4WD]](images/books/1921/25/index%2038.png)
[4WD]

3. Loosen the bolt & nut and then remove the rear upper arm (A) with the sub frame.
Tightening torque:
2WD
137.3 ~ 156.9N.m (14.0 ~ 16.0kgf.m, 101.3 ~ 115.7lb-ft)
4WD
98.1 ~ 117.7N.m (10.0 ~ 12.0kgf.m, 72.3 ~ 86.8lb-ft)
[2WD]
![[4WD]](images/books/1921/25/index%2040.png)
[4WD]

4. Installation is the reverse of removal.
CAUTION
Install the rear upper arm so that the letter 'R' can face the rear of vehicle.
Inspection
1. Check the bushing for wear and deterioration.
2. Check the rear upper arm or damage and deformation.
3. Check for all bolts and nut.
Rear Lower Arm
Repair procedures
Replacement
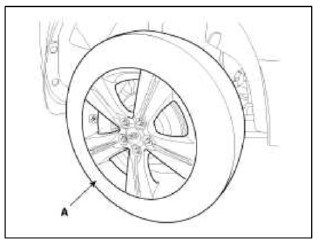
1. Remove the rear wheel & tire.
Tightening torque: 88.3 ~ 107.9N.m (9.0 ~ 11.0kgf.m, 65.1 ~ 79.6lb-ft)
CAUTION
Be careful not to damage to the hub bolts when removing the front wheel & tire (A).
2. Loosen the nut and then remove the rear stabilizer link (B) with the rear lower arm (A).
Tightening torque: 98. 1 ~ 117.7N.m (10.0 ~ 12.0kgf.m 72.3 ~ 86.8lb-ft

3. Loosen the bolt & nut and then remove the rear shock absorber (A) with the lower arm.
Tightening torque: 137.3 ~ 156.9N.m (14.0 ~ 16.0kgf.m, 101.3 ~ 115.7lb-ft)

4. Loosen the bolt & nut and then remove the rear lower arm (A) with the rear axle.
Tightening torque: 137.3 ~ 156.9N.m (14.0 ~ 16.0kgf.m. 101.3 ~ 115.7lb-ft)

5. Loosen the bolt & nut and then remove the rear lower arm (B) with the sub frame (A).
Tightening torque: 137.3 ~ 156.9N.m (14.0 ~ 16.0kgf.m. 101.3 ~ 115.7lb-ft)

6. Installation is the reverse of removal.
Inspection
1. Check the bushing for wear and deterioration.
2. Check the rear lower arm for deformation.
3. Check the coil spring and spring pad for deterioration and deformation.
4. Check for all bolts and nut.
READ NEXT:
 Rear Stabilizer Bar | Rear Assist Arm
Repair procedures
Replacement
1. Remove the rear wheel & tire.
Tightening torque: 88.3 ~ 107.9N.m (9.0 ~ 11.0kgf.m, 65.1 ~ 79.6lb-ft)
CAUTION
Be careful not to damage to the hub bolts
SEE MORE:
Closing the liftgate
The power liftgate will close automatically
by doing one of the following:
When the liftgate is opened, press and
hold the power liftgate open / close
button. The liftgate will close automatically
and the warning chime will
sound.
Press the power liftgate open/close
button until th
Engine Control Module (ECM)
Schematic Diagrams
ECM Terminal And Input/Output signal
ECM Terminal Function
Connector [CHTG-AG]
Connector [CHTG-BG]
ECM Terminal Input/Output signal
Connector [CHTG-AG]
Connector [CHTG-BG]
Circuit Diagram
Repair procedures
Removal
CA
Content
- Home
- Kia Sportage - Fifth generation (NQ5) - (2022-2025) - Owner's Manual
- Kia Sportage - Second generation (JEKM) (2005-2015) - Body Workshop Manual
- Kia Sportage Third generation (SL) - (2011-2016) - Service and Repair Manual
- Sitemap
- Top articles
