Kia Sportage: Body dimensions
Body dimension indications
Projected dimensions
The projected dimension indicates a dimension from a reference point on the body. (Height may be different in some cases).
Straight-line dimensions (Actual measured dimensions)
The straight-line dimension indicates a actual measured dimension between the measurement reference points.

Front body straight - line dimensions

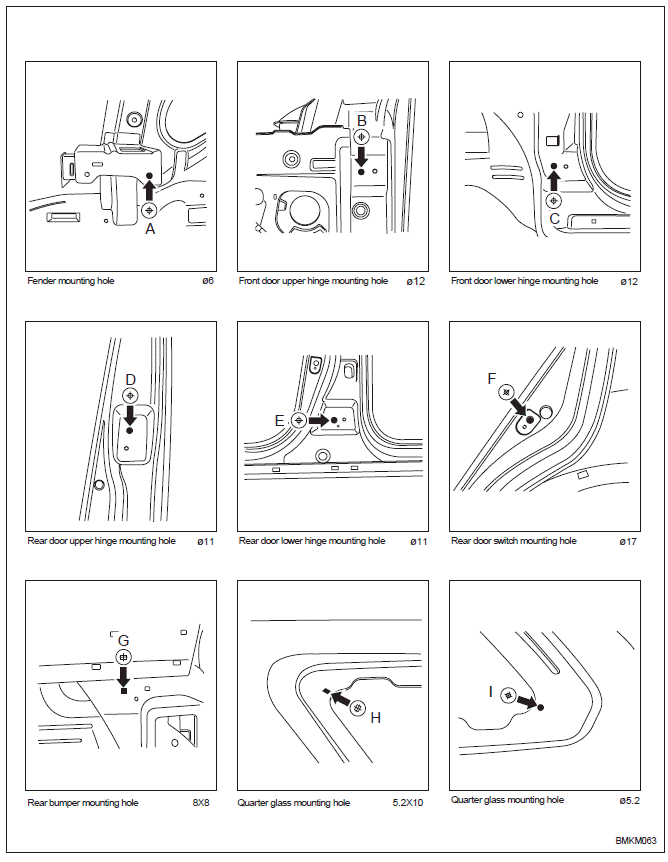
Side frame straight - line dimensions

Interior A straight - line dimensions
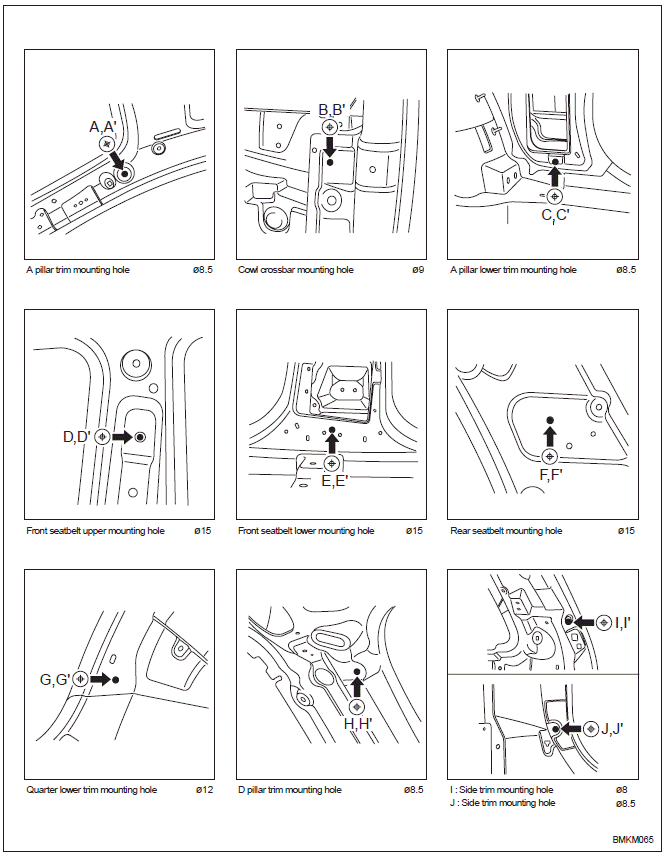

Interior B straight - line dimensions
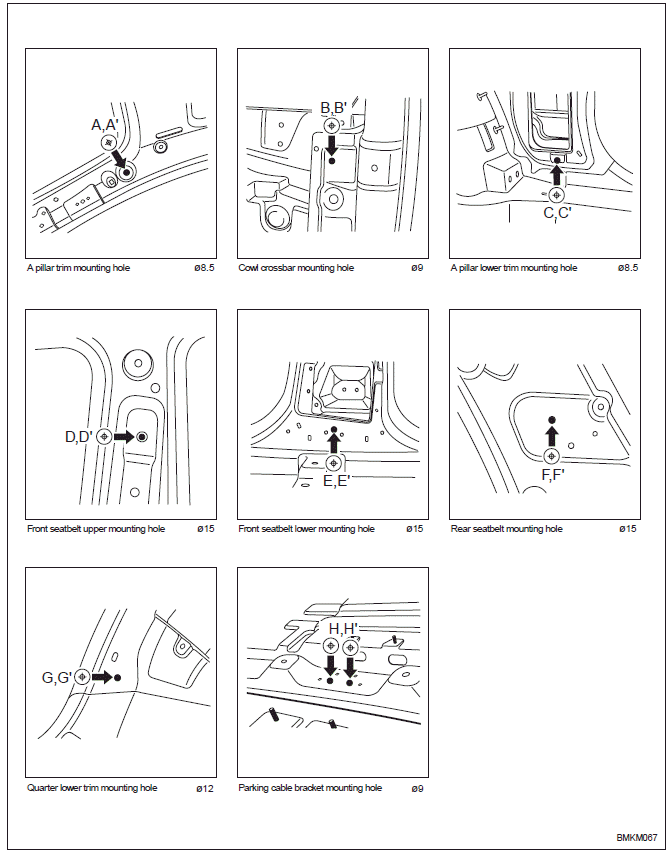

Interior C straight - line dimensions

Rear body straight - line dimensions
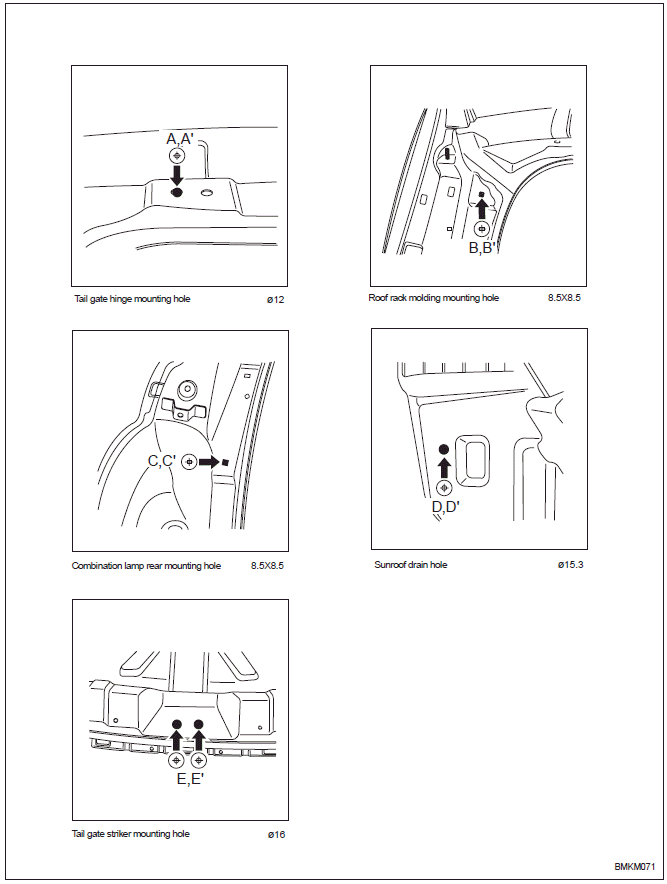

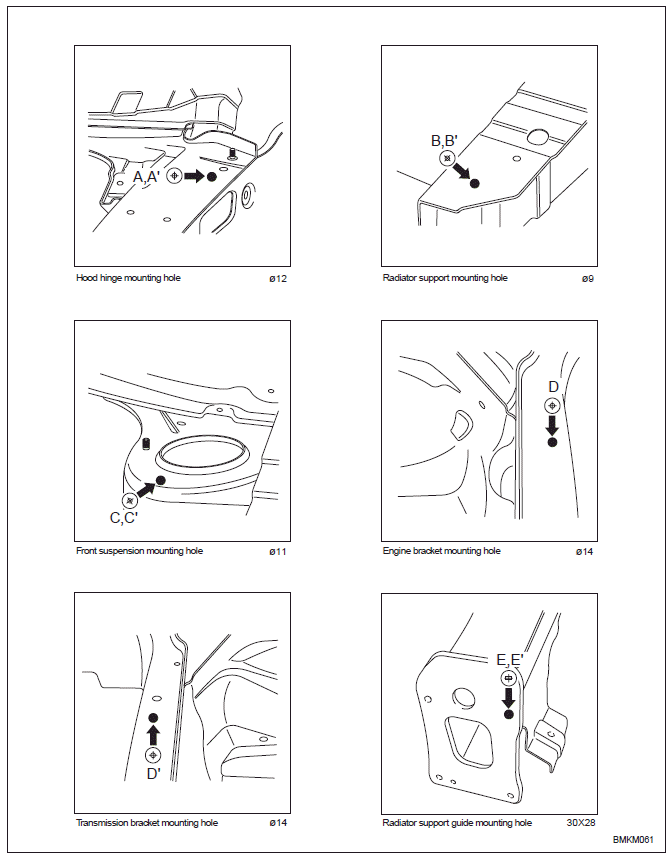
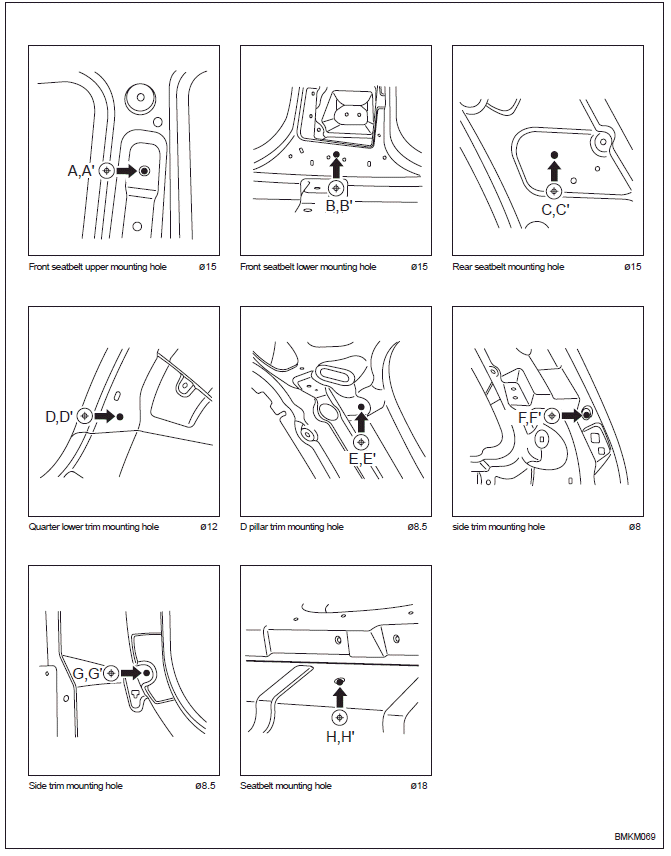
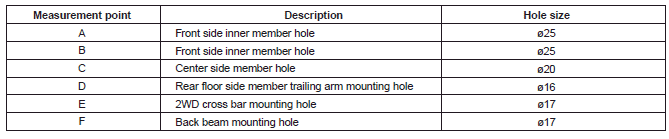
Under body dimensions
Projected dimensions
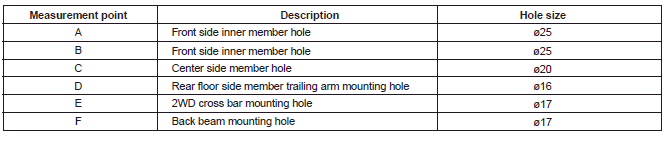

Straight-line dimensions

READ NEXT:
 Waterproof and rustproof
Sealing
To waterproof and rustproof the vehicle, apply sealer on assembled area of
the body panel and on any areas in
contact with the body, such as doors (inner/outer), hood (inner/outer), and ta
Body modification tools
Modification tools
Cut and disassembly tools
Assembly tools
Measurement tools
Welding machine
Buffing and grinding tools
Handheld tools
Repair tools set
SEE MORE:
Components and Components Location | Rear Glass Defogger Printed Heater
Component Location
Rear glass defogger relay
Rear glass defogger switch
Rear glass defogger
Rear Glass Defogger Printed Heater
Repair procedures
Inspection
CAUTION
Wrap tin foil around the end of the voltmeter test lead to prevent damaging the heater line. Ap
DBC Switch
Description and Operation
Description
The DBC function is the acronym word of Downhill Brake Control function. When
a vehicle goes down the hill, just
pushing the DBC switch enables the car to keep its vehicle's speed at a constant
value without operating the brake
pedal. The DBC f
Content
- Home
- Kia Sportage - Fifth generation (NQ5) - (2022-2026) - Owner's Manual
- Kia Sportage - Second generation (JEKM) (2005-2015) - Body Workshop Manual
- Kia Sportage Third generation (SL) - (2011-2016) - Service and Repair Manual
- Sitemap
- Top articles
