Kia Sportage: Smart key
Repair procedures
Smart Key
Smart Key Code Saving
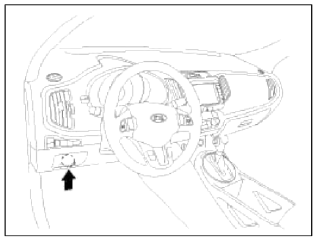
1. Connect the DLC cable of GDS to the data link connector (16 pins) in driver side crash pad lower panel, trim the power on GDS.
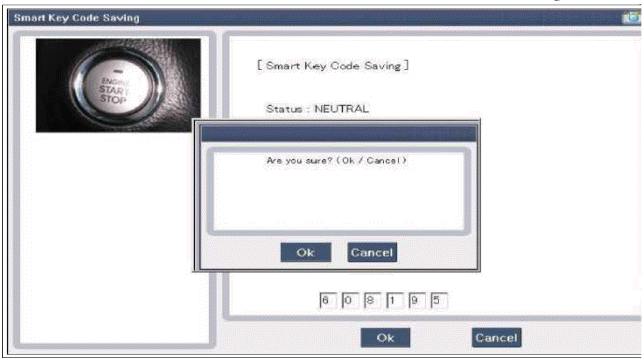
2. Select the vehicle model and then do "Smart key code saving".
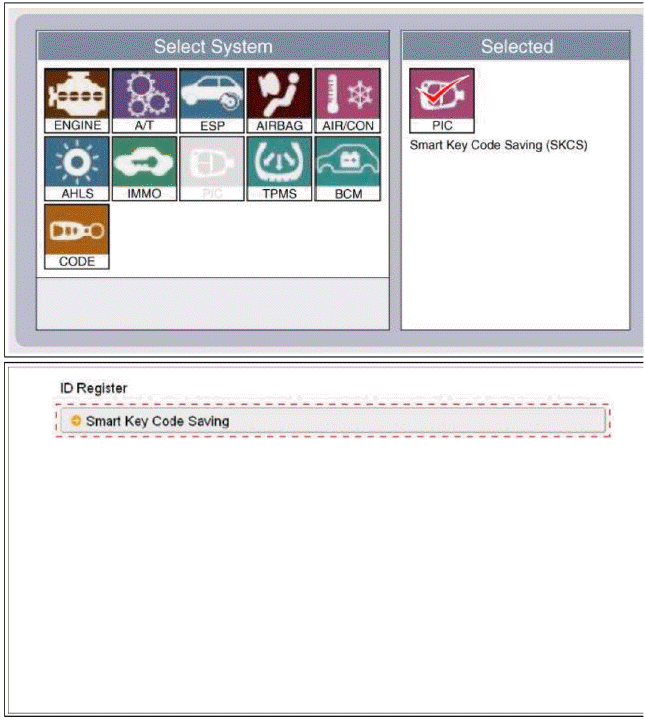
3. After selecting "Smart key teaching" menu, push "Enter" key, then the screen will be shown as below.
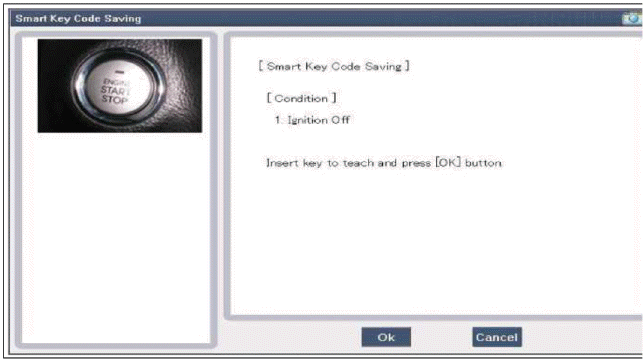
4. After inserting the teaching key, push "ENTER" key.
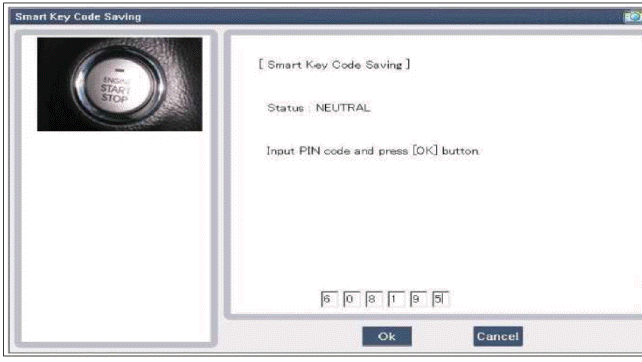
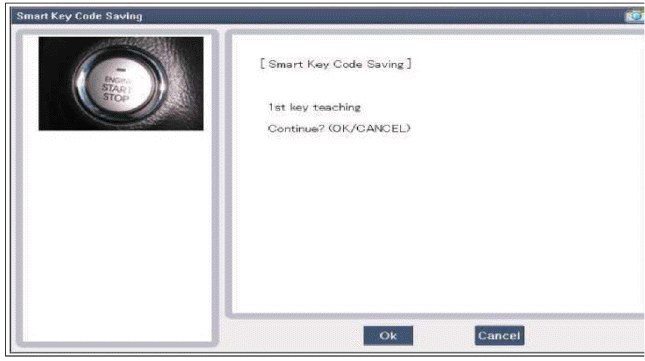
5. Input the "Pin code" for first key teaching.
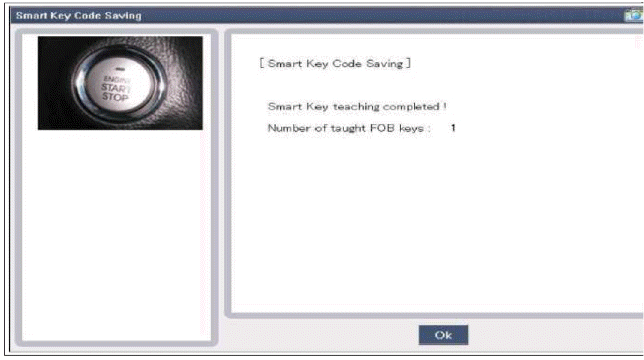
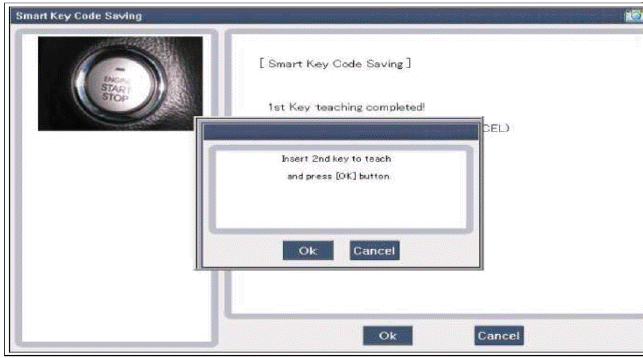
6. Confirm the message "First key teaching completed".
7. Input the "Pin code" for second key teaching.

8. Confirm the message "Second key teaching completed".
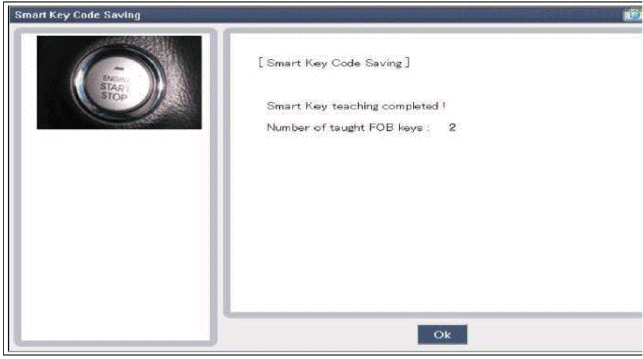
9. Then the screen will be shown as below when key teaching process is completed.
READ NEXT:
 Smart key unit
Components and Components Location
Components
Connector Pin Information
Connector A (14 Pin)
Ground 1
A_ACC
A_IGN2
A_IGN1
VBAT_CPU
VBAT_LOAD
Ground 2
-
O_Exterior buzzer
Specifications, Components and Components Location | Description and Operation
Specifications
Specification
Components and Components Location
Component Location (1)
Hood switch
Burglar horn
RKE receiver
BCM (Body Control Module)
Fro
SEE MORE:
Rear View Monitor operation
Parking/View button
Press the Parking/View button (1) to turn
on or off Rear View Monitor.
Rear view
Operating conditions
Rear View Monitor will turn on when the
following conditions are satisfied:
Shifting the gear to R (Reverse).
Pressing the Parking/View button (1)
while P (Pa
Power window lock button
The driver can disable the power window
switches on the rear passengers'
doors by pressing the power window
lock button to the lock position
(pressed).
When the power window lock button is
pressed:
The driver's master control can operate
all passengers' power windows.
T
Content
- Home
- Kia Sportage - Fifth generation (NQ5) - (2022-2025) - Owner's Manual
- Kia Sportage - Second generation (JEKM) (2005-2015) - Body Workshop Manual
- Kia Sportage Third generation (SL) - (2011-2016) - Service and Repair Manual
- Sitemap
- Top articles
